
On this page
- Quick answer: how do beginners create winged eyeliner?
- What do you need for beginner winged eyeliner?
- Which eyeliner is easiest to control?
- Should you tightline before drawing the wing?
- How do you find the right wing direction?
- How do you apply winged eyeliner step by step?
- Step 1: Prep the eyelid
- Step 2: Place two endpoints before drawing the wings
- Step 3: Draw a short outer guide
- Step 4: Connect the tip back to the upper lash line
- Step 5: Refine the point without making the whole wing bigger
- Step 6: Build the second wing at the same stage
- Step 7: Clean the lower edge
- How do you make both eyeliner wings look symmetrical?
- How do you fix common winged-eyeliner mistakes?
- The wing points downward
- One wing is longer
- The liner became too thick
- The edge looks bumpy
- The wing disappears into a fold
- What is the difference between a sharp wing and a smudged wing?
- Want to practice the softer pencil method with a full lesson sequence?
- How do you use eyeliner safely around the eyes?
- The beginner rule that saves the most time
- Frequently Asked Questions
Winged eyeliner gets easier when you stop trying to draw one perfect line. Map a short outer guide, build the shape in small sections, work on both eyes at the same pace, and clean the lower edge only after the wings match. This tutorial shows a crisp wing first, then explains how to turn the same idea into a softer smudged wing.
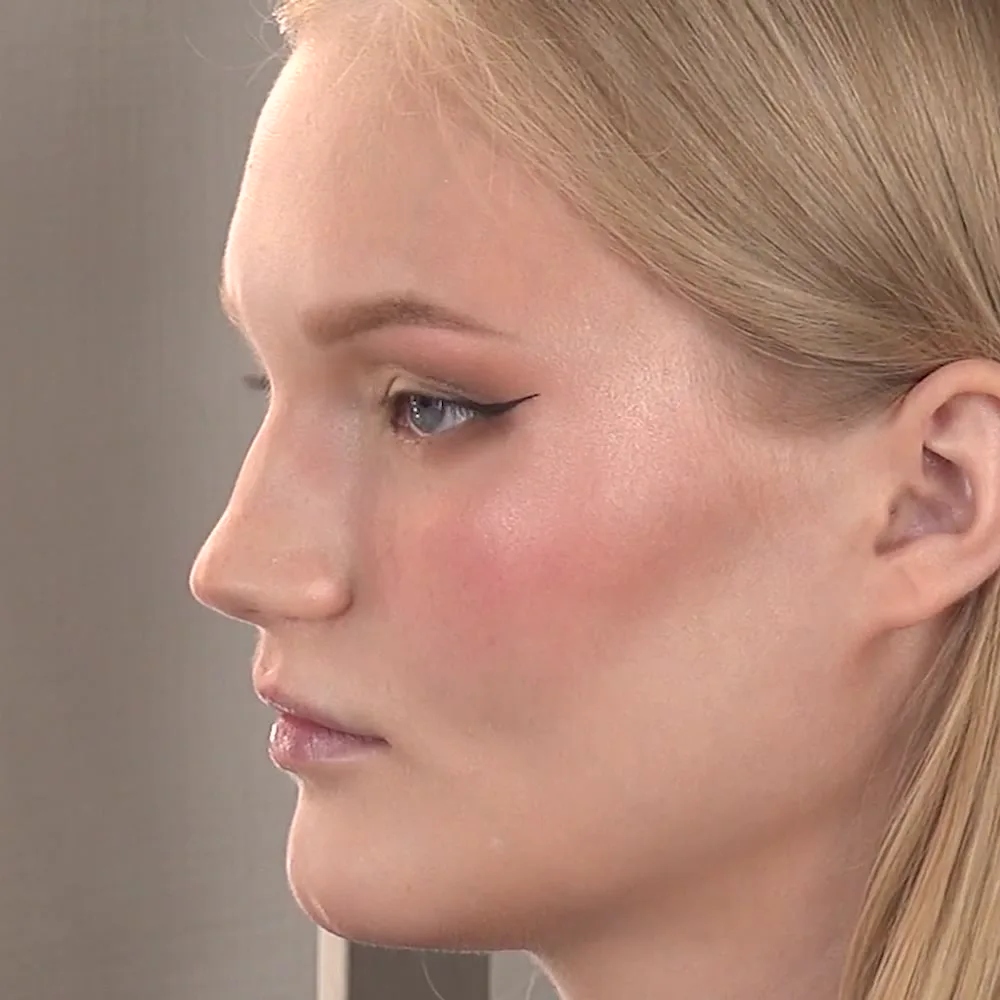
A finished sharp wing from the course demonstration. This frame shows the result, not the application process.
Quick answer: how do beginners create winged eyeliner?
- Prep the lid and choose a liner you can control.
- Look straight into a mirror and decide where each wing should end.
- Map a short line from the outer corner in the direction of the lower lash line.
- Connect the tip back toward the upper lash line.
- Fill the small shape and keep the liner thinner toward the inner eye.
- Repeat the same stage on the second eye before making either wing longer.
- Compare both wings with your eyes open, then clean the lower edges with a small brush or cotton swab.
The goal is not to force both eyes into identical shapes. It is to make the direction, visible length, and weight of the two wings look balanced when your face is relaxed.
What do you need for beginner winged eyeliner?
Start with a stable mirror, clean hands, good light, and a product made for the eye area. You may also want a small angled brush, cotton swabs, and a little concealer or makeup remover for cleanup. If you are still building your basic eye kit, our guides to beginner eyeshadow and types of makeup brushes explain the surrounding tools without requiring a large collection.
Which eyeliner is easiest to control?
| Liner format | What it does well | Main challenge | Best use in this tutorial |
|---|---|---|---|
| Pencil | Makes a soft, adjustable mark and can be blended | May not create the sharpest point by itself | Mapping or creating a smudged wing |
| Gel with an angled brush | Lets you build thickness gradually and use the brush edge as a guide | The result depends on brush loading and pressure | A controlled, crisp wing |
| Felt-tip pen | Combines product and applicator in one tool | A flexible tip can skip if you press too hard | Short strokes along the lash line |
| Liquid liner | Creates a dark, graphic edge | Wet liner can spread or be harder to correct | Tracing a shape after you are happy with the map |
You do not need to buy every format. For a first attempt, choose the liner that lets you place small marks without rushing. A soft pencil is useful when you want a forgiving map; gel and liquid are better when a crisp black finish is the priority.
Should you tightline before drawing the wing?
Tightlining means placing liner between the upper lashes so the lash base looks more continuous. The Oh!Nice course sequences introduce this stage before the outer wing direction, but it is optional for the tutorial. Tightlining does not determine the angle or symmetry of the wing.
If you include it, use a clean pencil intended for the eye area and work gently between the lash roots. Skip the step if the eye area is irritated or the product causes discomfort. A beginner can practice the outer wing first and return to tightlining later.
How do you find the right wing direction?
The wing should respond to your own outer corner and visible eye shape, not copy an angle from someone else’s face. Sit upright, relax your brows, and look straight ahead. Imagine the lower lash line continuing outward. That imaginary extension gives you a starting direction, but the final angle may need to move slightly so it stays visible when your eye is open.
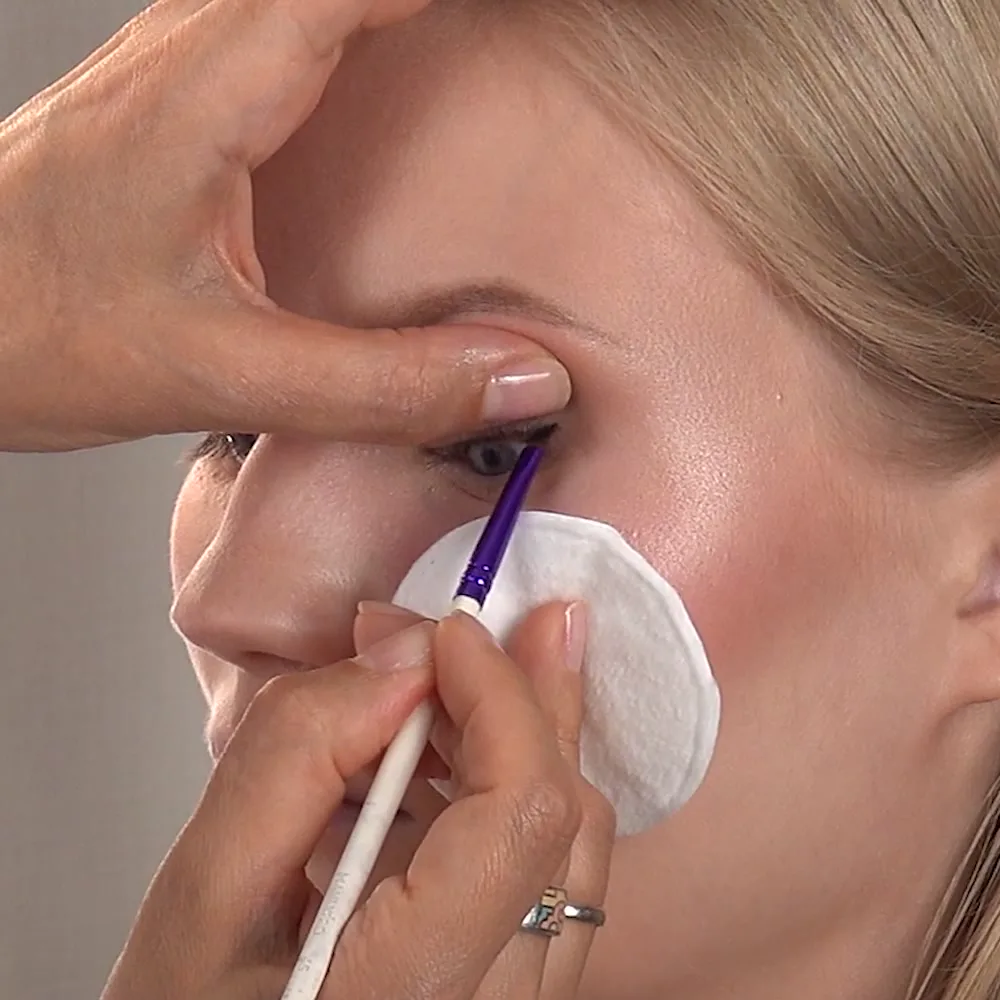
Map the wing from the outer corner before adding thickness.
For hooded or folded lids, keep the eye open while you place the endpoint. If a crease covers the planned wing, shorten the guide or move the visible portion before filling it. Do not pull the skin tight and judge the shape only while the eye is closed; the line can change when the skin returns to its natural position.
How do you apply winged eyeliner step by step?
Step 1: Prep the eyelid
Remove excess skincare from the lid and let the area dry. If your eyelids become oily, use a thin layer of eye primer or a small amount of setting powder. Finish eyeshadow before drawing a crisp wing so blending does not blur the liner afterward.
Keep the applicator clean and work while seated or standing still. The U.S. Food and Drug Administration’s eye-cosmetic guidance advises washing your hands, keeping eye-area tools clean, not sharing eye cosmetics, and never applying them in a moving vehicle.
Step 2: Place two endpoints before drawing the wings
Look straight into the mirror and place a tiny dot or short mark where you want each wing to end. Compare the two points across the face. Check their visible height and distance from the outer corners, not their relationship to one eyebrow alone.
This checkpoint prevents a common beginner problem: finishing one long wing and then trying to make the second side catch up.
Step 3: Draw a short outer guide
From the outer corner, draw a short line toward the endpoint. Use light pressure. It is easier to extend a small guide than remove a large dark line.
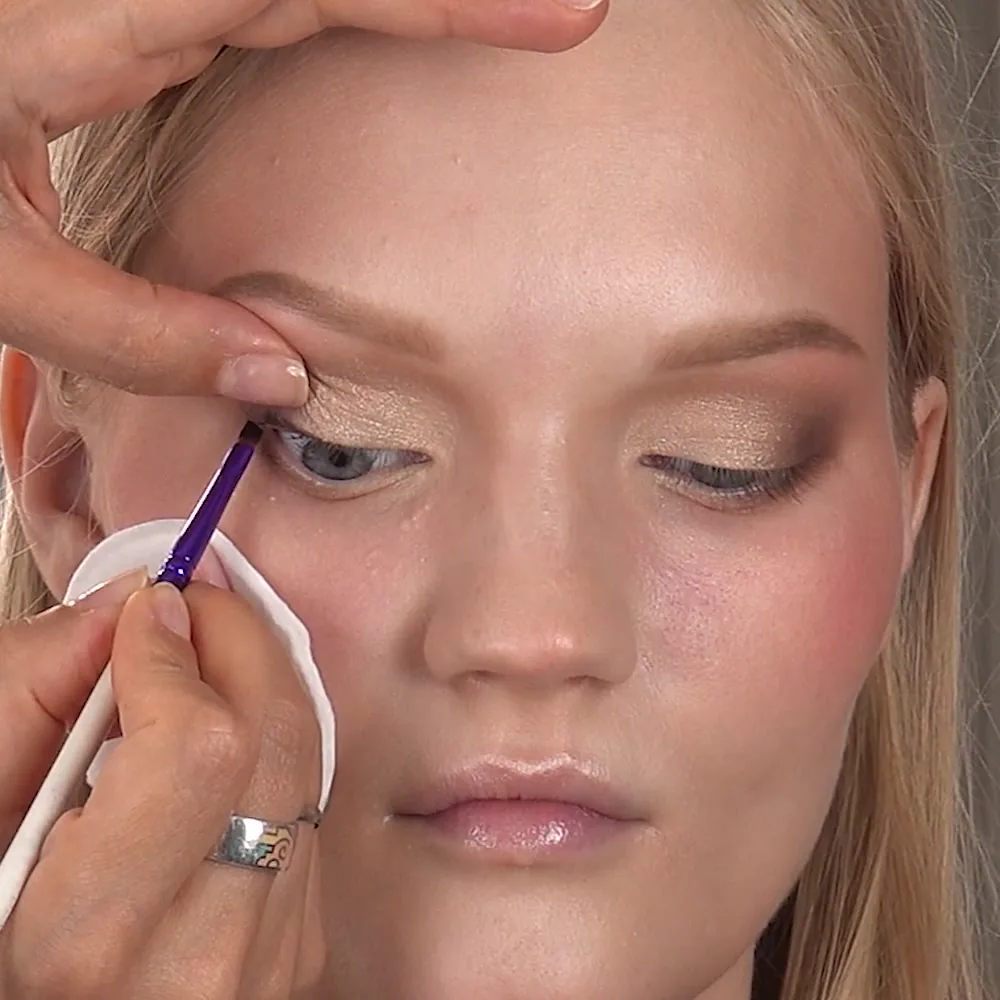
Start with a short guide; a small mark is easier to correct than a long wing.
If your line skips, do not repeatedly drag the applicator over the same skin. Lift it, reload the brush if needed, and use another short stroke.
Step 4: Connect the tip back to the upper lash line
From the outer tip, draw back toward the upper lash line to make a small open shape. The connection should meet the lash line smoothly rather than creating a heavy block at the outer corner. Fill the shape with short strokes.
Keep the line close to the lashes as you move inward. A beginner wing usually looks cleaner when the inner section stays thin and the thickness increases gradually toward the outside.
Step 5: Refine the point without making the whole wing bigger
Use the narrow edge of an angled brush or liner tip to sharpen only the final point. Hold the tool almost parallel to the wing and pull a small amount of product outward. Avoid tracing the entire top and bottom edge again each time you want a sharper tip; repeated outlining often makes the wing thicker than planned.
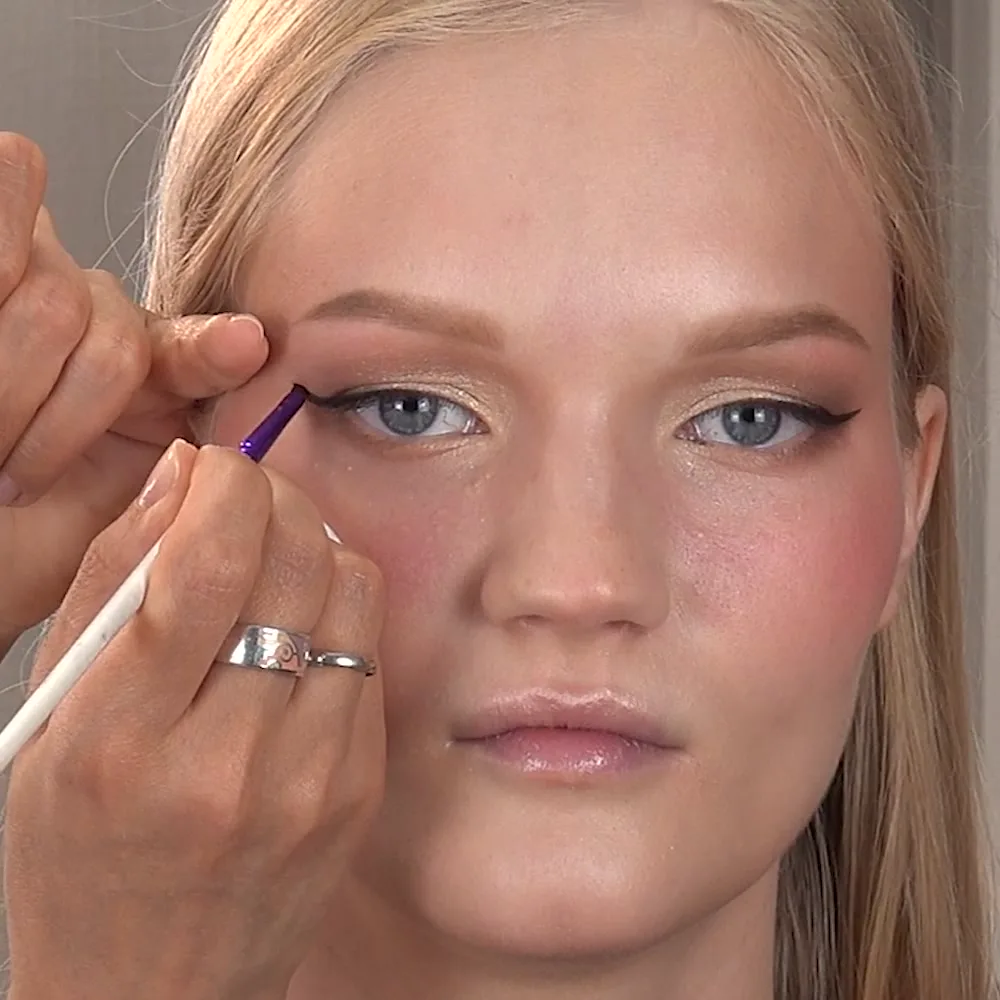
Refine the point with the brush almost parallel to the wing.
Step 6: Build the second wing at the same stage
Repeat the endpoint, outer guide, connection, and fill on the second eye. Move back and forth between the eyes instead of completing every correction on one side first.
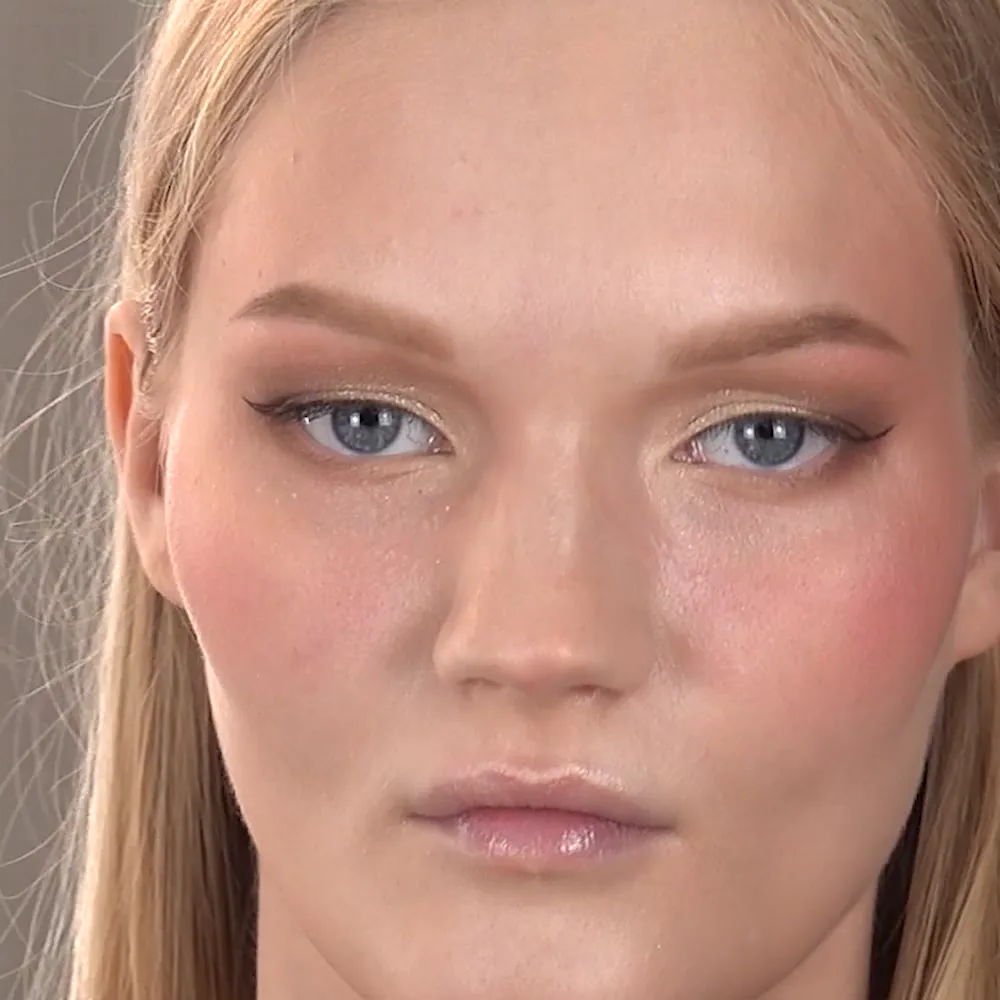
Compare the endpoints and angles with both eyes open before adding more liner.
Your eyes may not be naturally symmetrical. Judge the wings by what is visible when you look forward: direction, length, and thickness. A small anatomical difference does not need to be “corrected” by endlessly extending one side.
Step 7: Clean the lower edge
Wait until the two shapes are balanced. Then use a clean, small flat brush with a tiny amount of concealer or remover to sharpen the lower boundary. Move away from the eye, not toward it, and keep product out of the eye itself.
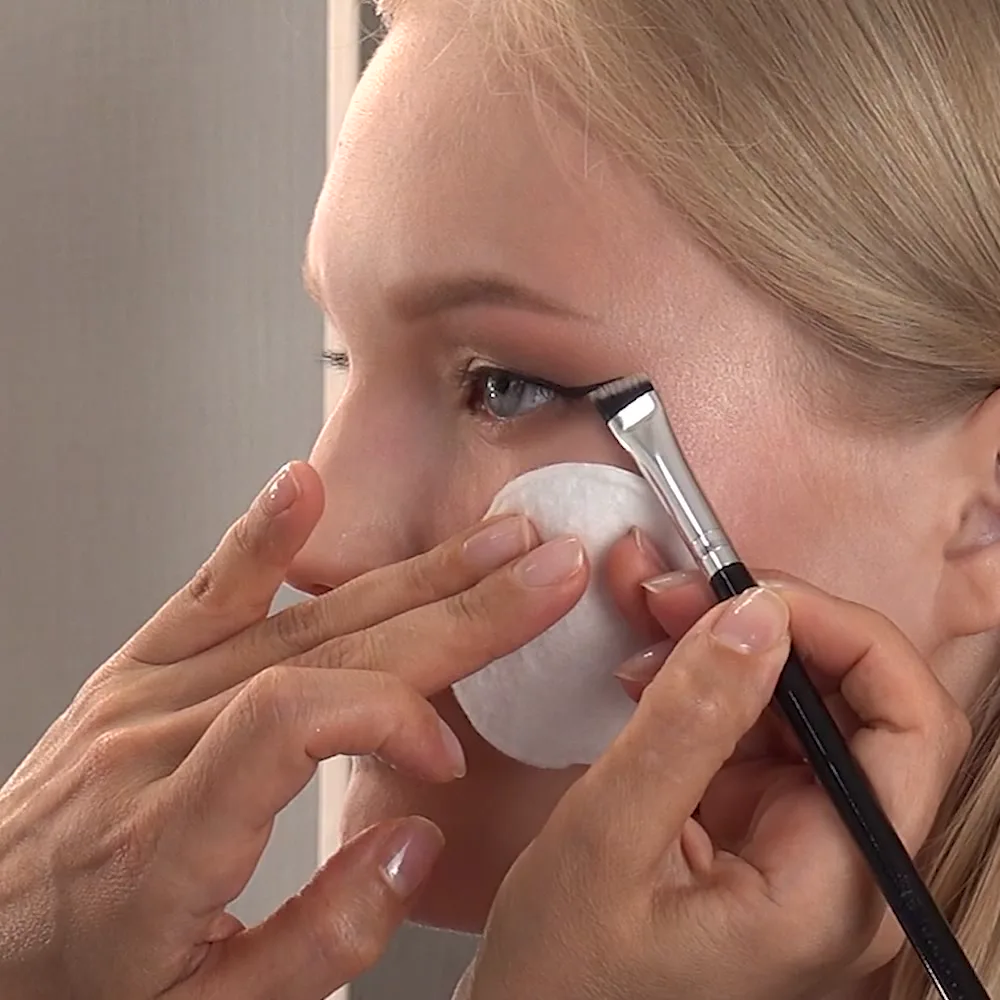
Clean under the wing with a small flat brush, using light pressure near the eye.
If the mistake is still wet, a clean pointed cotton swab may be enough. If you use remover, let the skin dry before adding concealer or redrawing the line.
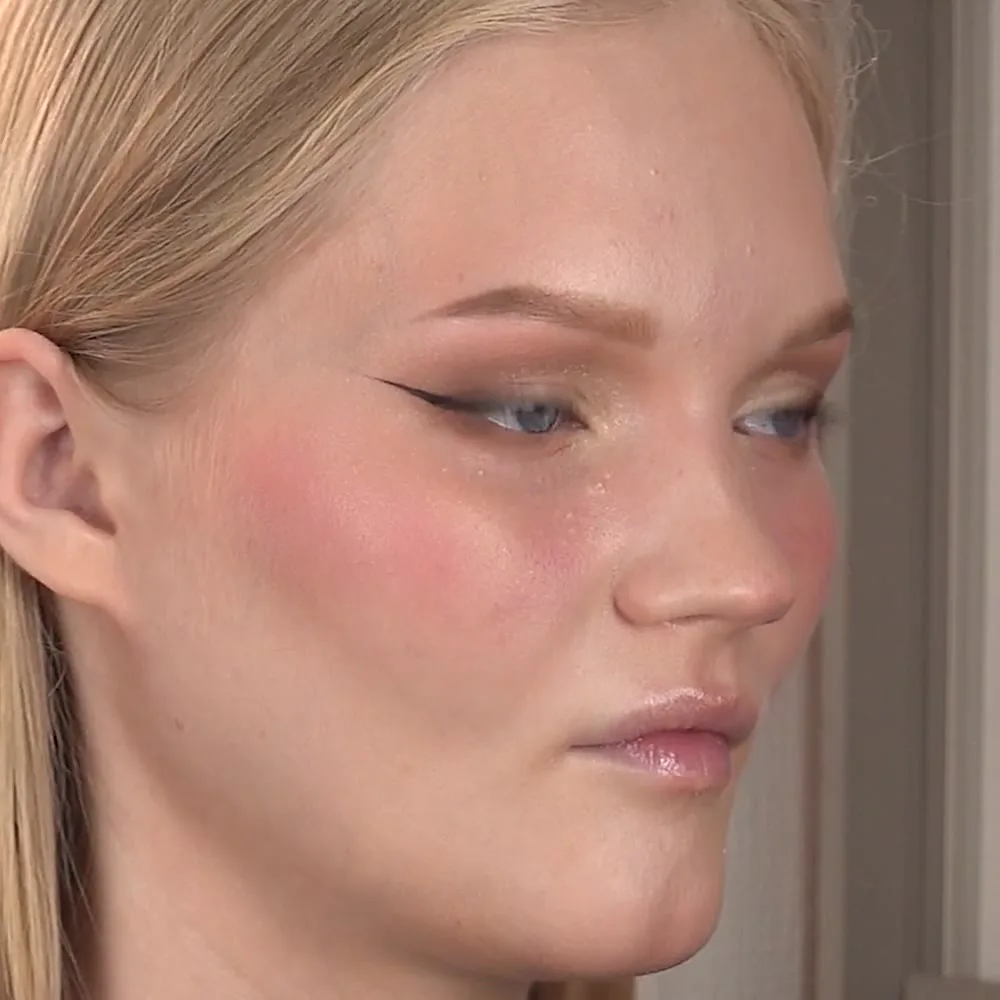
The finished sharp wing: thin across the lid, pointed at the outer corner.
How do you make both eyeliner wings look symmetrical?
Use checkpoints instead of waiting for the final result. Compare the two sides after the endpoints, after the outer guides, and after the shapes are filled.
- Keep your face level and your brows relaxed.
- Look at the same mirror from the same distance.
- Compare visible endpoints before comparing the tiny details.
- Correct the shorter or lighter side first.
- Stop extending the wings when the difference is small enough that it disappears at normal viewing distance.
Taking a front-facing phone photo can reveal a height difference, but avoid judging your work from an extreme close-up alone. People see the complete face, not a single enlarged eye.
How do you fix common winged-eyeliner mistakes?
The wing points downward
Remove only the tail and map it again from the outer corner. Check the direction with the eye open before reconnecting it to the lash line.
One wing is longer
Do not automatically lengthen the other side. First decide which length suits the face. Shorten the longer wing from its tip when possible; otherwise, add only a tiny amount to the shorter side.
The liner became too thick
Clean the upper or lower boundary with a small brush rather than adding more liner to “even it out.” If the line is heavy across the entire lid, removing and redrawing the outer section may be faster than continuing to build.
The edge looks bumpy
Use shorter strokes and reduce pressure. Rest your elbow on a stable surface. A brush loaded with too much product can also leave a thick first mark, so wipe off excess before touching the eye.
The wing disappears into a fold
Place the endpoint with the eye open and keep the outer shape visible above or beyond the fold. Do not promise yourself one universal hooded-eye angle: lid folds and outer corners vary, so the shape needs to be mapped on the actual eye.
What is the difference between a sharp wing and a smudged wing?
A sharp wing has a defined top edge, lower edge, and pointed tip. A smudged wing begins with pencil and is softened with a brush or shadow. The second option is not a failed liquid wing; it is a separate finish with a diffused boundary.
| Feature | Sharp wing | Smudged wing |
|---|---|---|
| Main product | Gel, pen, or liquid liner | Eye-safe pencil, often set or softened with shadow |
| Edge | Crisp and graphic | Soft and blended |
| Correction | Clean the boundary precisely | Blend first, then clean only where definition is needed |
| Best visual effect | Clear outer point | Softer depth around the outer eye |
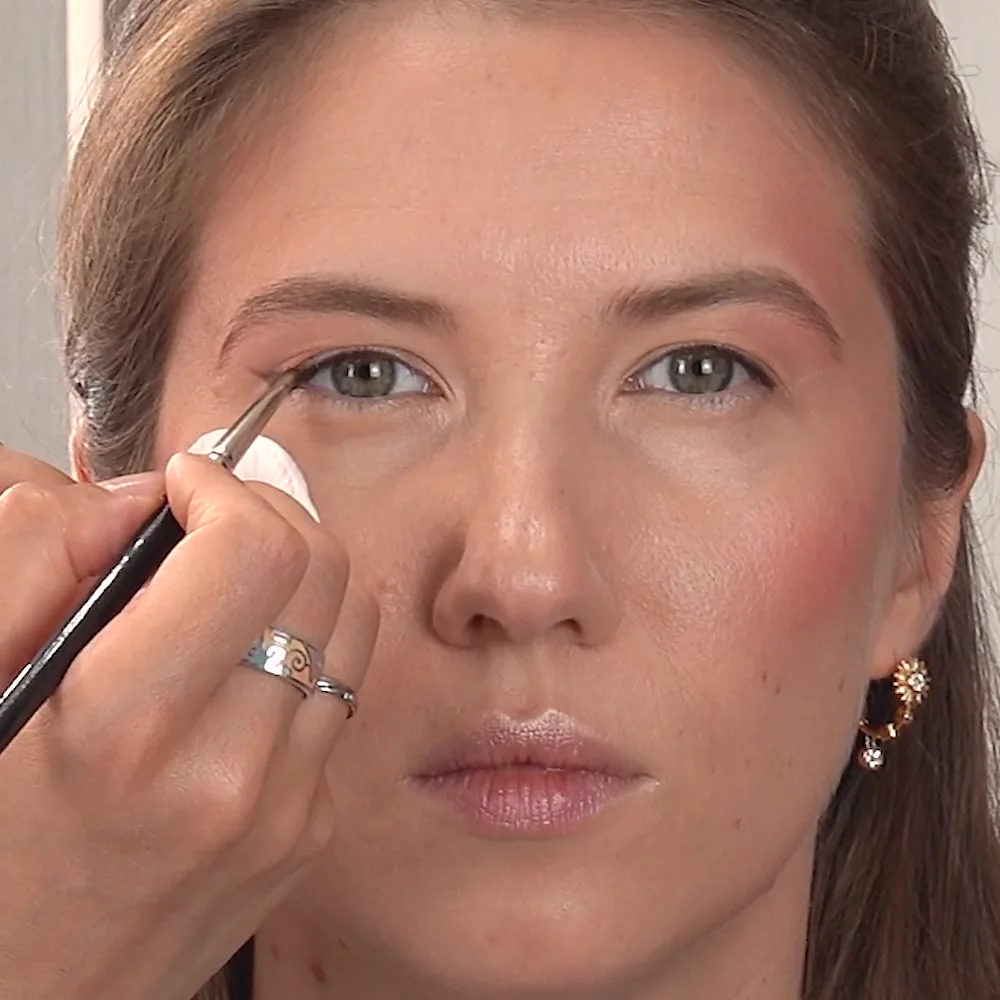
For a smudged wing, build a pencil shape first and keep the edge soft.
For the smudged version, sketch the pencil shape, blend outward with a small brush, and preserve the direction while softening the top edge. Clean the lower boundary if you want lift without turning the entire shape into a sharp graphic line.
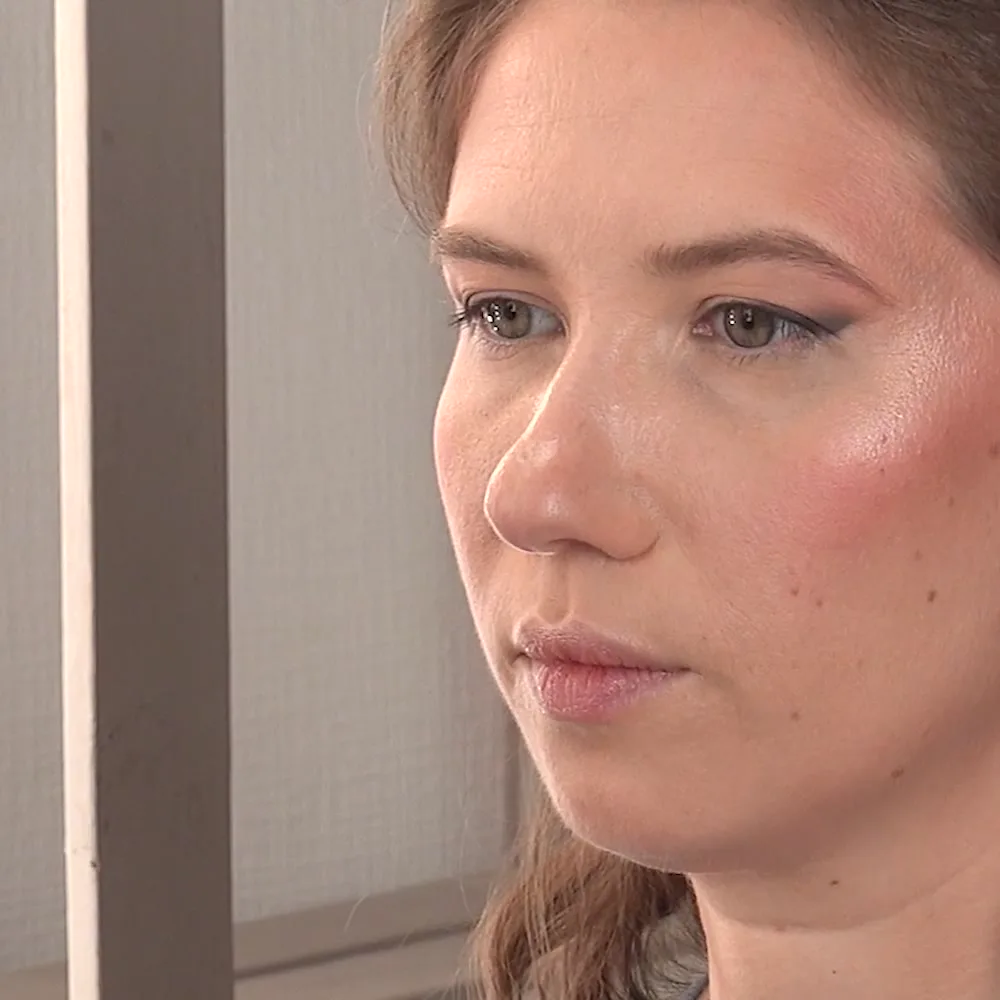
A smudged wing has a diffused edge instead of a crisp graphic point.
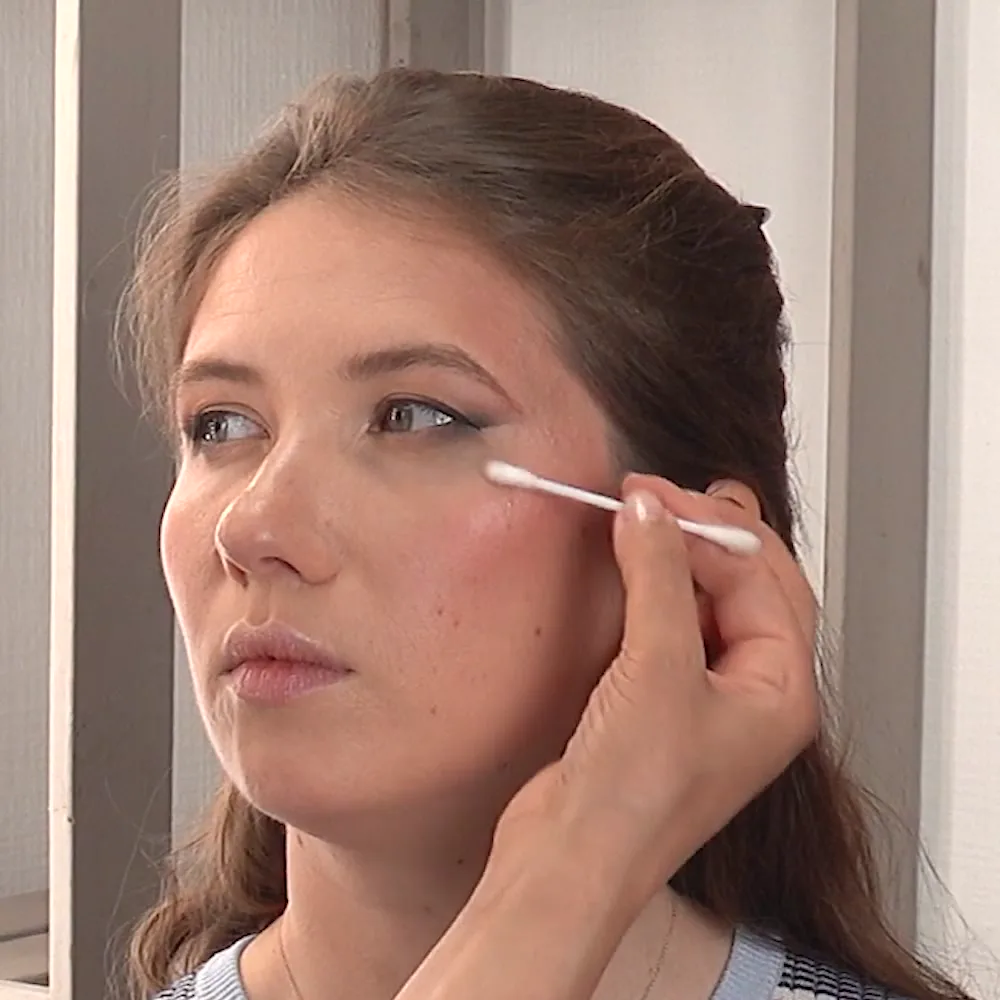
Clean only the lower boundary if you want to keep the top edge softly blended.
Want to practice the softer pencil method with a full lesson sequence?
The Oh!Nice SPACE Winged Eyeliner Course teaches a smudged pencil technique on a model. It includes 24 English video lessons covering the full makeup base, wing direction, the second eye, blending, edge cleanup, and the finished look. The current listed price is $15 as a one-time payment with lifetime access.
This is the right course link for the soft pencil method shown above. It is not a liquid-liner course and does not promise a separate technique for every eye shape. Learners under 18 should have a parent or guardian manage the purchase and account.
How do you use eyeliner safely around the eyes?
Use only products labeled for the eye area. Wash your hands, keep brushes and applicators clean, and do not share eyeliner. Stop using a product if it causes irritation; if irritation continues, seek medical advice. Do not apply eye makeup while riding in a moving car or bus, because an applicator can scratch the eye during a sudden movement. These points follow the FDA’s current consumer guidance for eye cosmetics.
The beginner rule that saves the most time
Map first and add product second. Short guides, alternating between the two eyes, and delaying cleanup until the shape is balanced will do more for symmetry than repeatedly extending the tips. Once the construction feels comfortable, choose the finish you actually want: crisp and graphic or soft and smudged.
Frequently Asked Questions
Should beginners use pencil or liquid eyeliner for a wing?
Pencil is easier to soften and correct, while liquid creates a darker, sharper edge. A useful beginner approach is to map the shape with pencil or shadow, then trace it with gel or liquid only after the direction looks right.
Should you draw the wing or the lash line first?
For this method, map the outer wing first, then connect it to the upper lash line. Starting with the endpoint makes it easier to compare the direction and visible length on both eyes.
How do you stop winged eyeliner from becoming too thick?
Begin with a short guide, keep the inner lash line thin, and refine only the point. Do not redraw every edge each time you make a correction.
Can winged eyeliner work on hooded eyes?
Yes, but the shape must be mapped while the eye is open so the fold does not hide the visible part of the wing. There is no single angle that fits every hooded lid.
How do you remove a wing without ruining the rest of your makeup?
Use a pointed cotton swab or small flat brush with a minimal amount of remover. Clean the specific edge, let the area dry, and replace concealer or base only where it was disturbed.
Why do my two wings look different?
Natural eye shapes are rarely identical, and completing one wing before starting the other can exaggerate the difference. Build both sides in the same small stages and compare them with your eyes open.