On this page
- What do you need for a hair bow hairstyle?
- How do you make a hair bow hairstyle step by step?
- Watch the free Hair Bow video lesson
- Why does a hair bow look uneven or fall flat?
- Frequently asked questions
- Can you make a bow out of your own hair?
- How long does your hair need to be?
- Can you do a half-up hair bow instead?
- Can you make this hair bow without bobby pins?
- How do you hide the hair tie?
- Do you need a curling iron to make this bow?
A hair bow gets its shape from a folded ponytail: the loop becomes the sides, and the loose ends cover the middle. If you want to learn how to make a hair bow hairstyle with a smooth, high finish, follow the photo tutorial below. Each step uses a frame from the OhNice SPACE Hair Bow lesson, so you can see how the style develops on the same model.
This is the Hair Bow lesson from our Online Hairstyling Course for Teens. The self-paced course is designed for ages 11–17 and includes 10 video lessons covering bows, braids, buns and curls. Watch the full Hair Bow video below as a free sample; the other lessons are available after enrollment.
At a glance
- Start with a smooth ponytail at the crown, where you want the finished bow to sit.
- Pull the ponytail only partway through an elastic to make a loop, leaving the ends toward the face.
- Divide the loop into two sides and pin their lower edges before wrapping the centre.
- Bring the loose ends over the middle, hide the remaining length underneath, and refine the shape with hairspray.
What do you need for a hair bow hairstyle?
Have a paddle brush, a tail comb, soft hair elastics, bobby pins and hairspray within reach. The instructor introduces five bobby pins and recommends using two soft elastics together for the ponytail in the Hair Bow lesson in our online hairstyling course. Keep extra pins nearby if you have more ends to tuck away.
| Tool | What it does in this tutorial |
|---|---|
| Paddle brush | Detangles the hair and directs it toward the crown |
| Tail comb | Smooths the surface and helps separate the bow evenly |
| Soft hair elastics | Hold the ponytail base and the folded loop |
| Bobby pins | Anchor the loops, centre wrap and loose ends |
| Hairspray | Helps control flyaways and support the finished shape |
The lesson also includes heat protectant during preparation. No hot-tool step appears in this bow demonstration. If you prepare your hair with heat beforehand, follow the heat tool and protectant instructions.
Set up a second mirror if you are styling your own hair. You will need to check the back when hiding the ends. The demonstration is performed by an instructor on a model, so allow yourself room to pause and reposition your hands.
How do you make a hair bow hairstyle step by step?
Make the base first, then shape and secure the bow in stages. Keep the loose tail separate until the loops are pinned: you need that hair to create the centre wrap.
Watch the free Hair Bow video lesson
See the complete 4:58 sample lesson here, then use the step-by-step photos below to practise.
If the player does not load, watch the lesson on Vimeo.
-
Brush the hair back and smooth the surface.
Detangle the lengths with your paddle brush, then direct the hair away from the face. Brush the sides and back upward toward the crown while gathering the hair in your other hand. Smooth the hair underneath as well as the visible top layer.
If you see a bump, hold the gathered hair and work over that area before adding the elastics. It is easier to adjust the base now than after the bow is pinned.
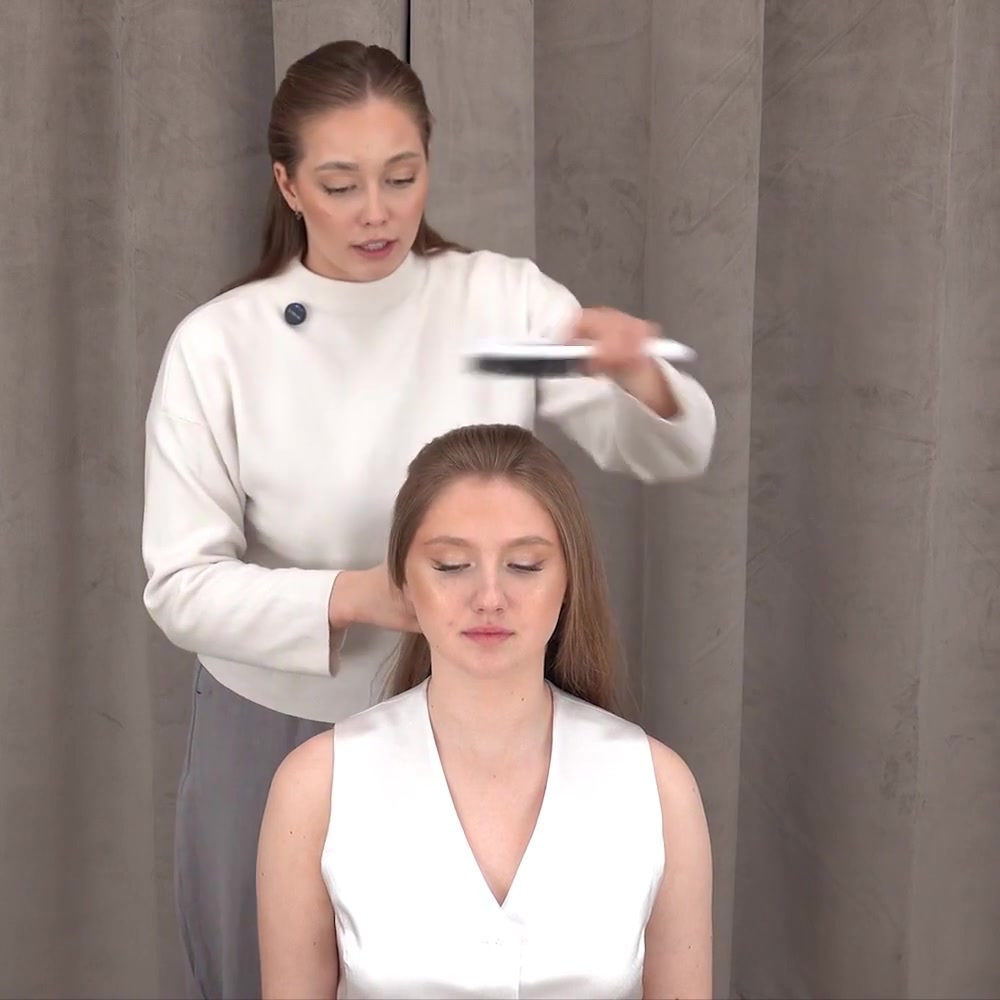
Brush all the hair toward the position of the ponytail.
-
Secure a high ponytail at the crown.
Gather the hair where you want the bow to sit and fasten the ponytail. In the lesson, the instructor uses soft elastics together to support the base. Aim for a firm, comfortable hold; the base should stay in position as you handle the lengths.
Use your comb to smooth the surface around the ponytail. Apply hairspray where needed to control stray hairs, following the product directions. Check the sides before you start shaping the bow.
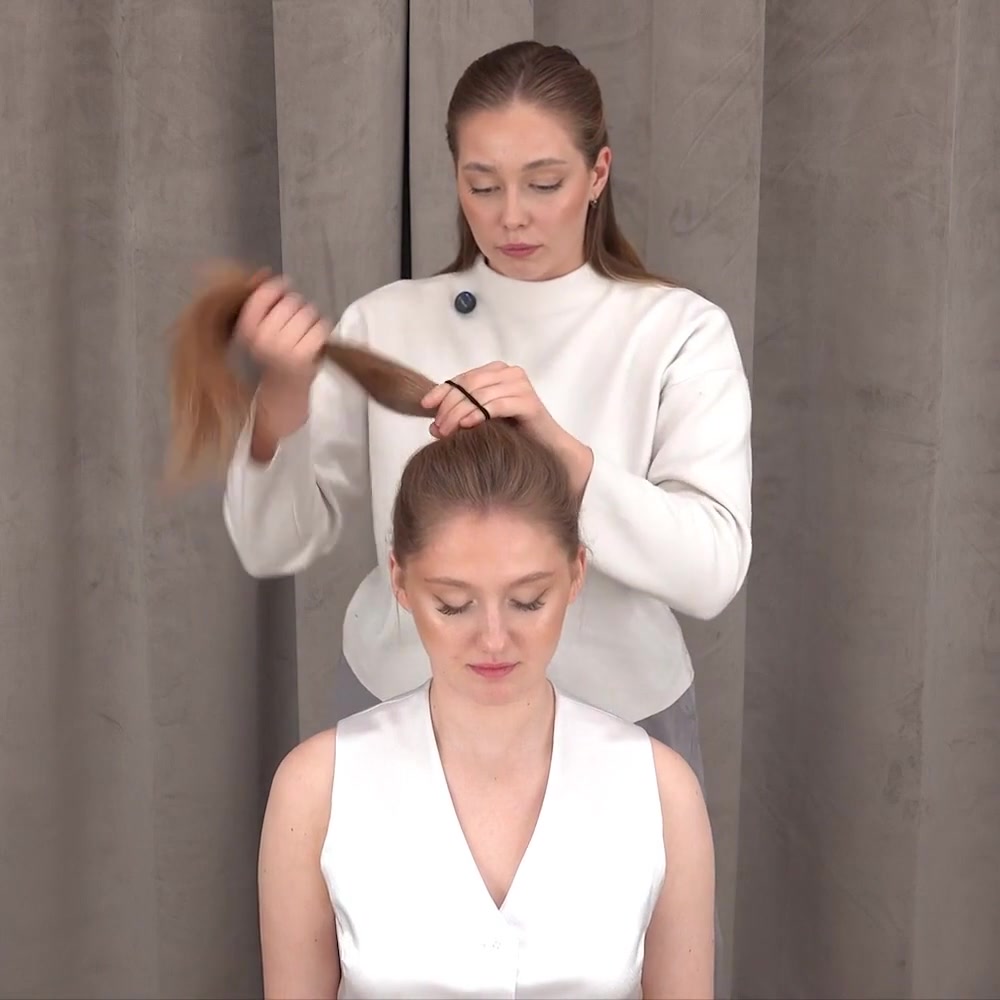
The ponytail base determines the position of the finished bow.
-
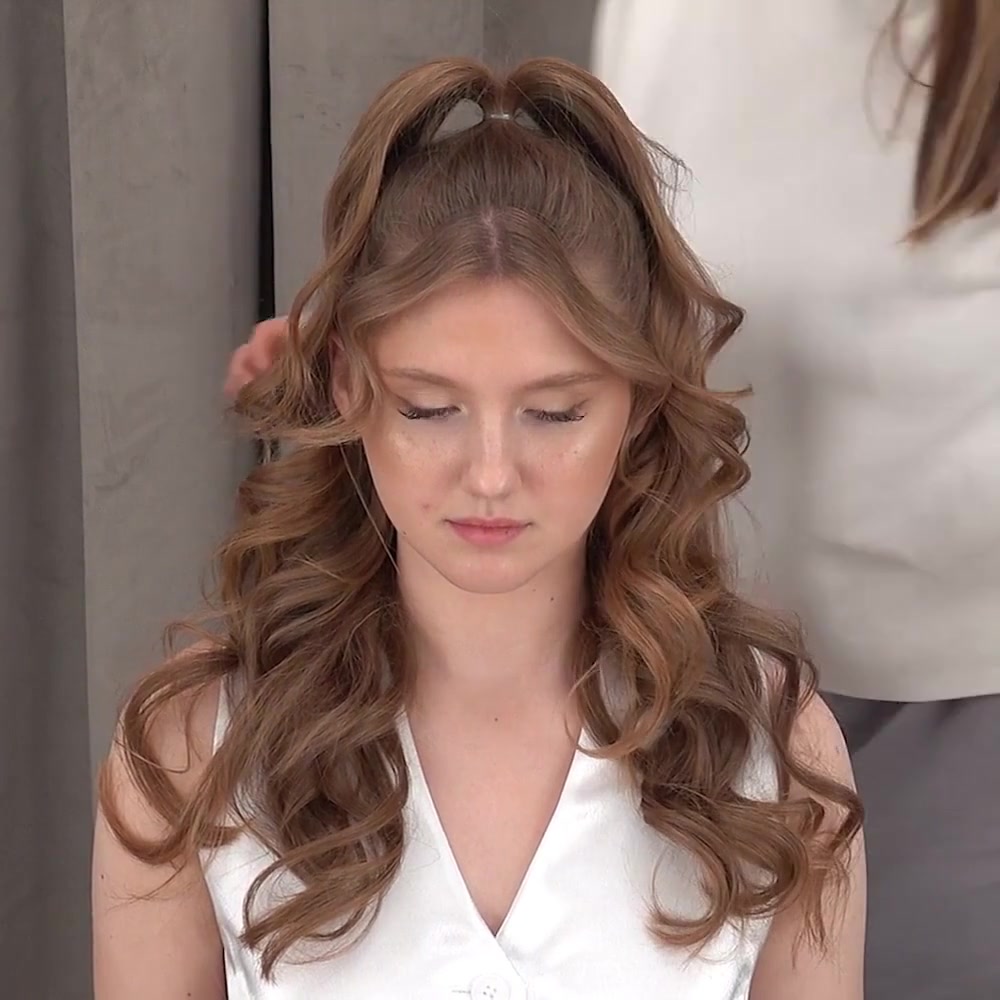
Fold the ponytail into a loop, leaving the ends forward.
Bring the ponytail forward, toward the face. Work an elastic around the ponytail and, on the pass that forms the bow, pull the hair only partway through. Stop with a folded loop above the base and the loose ends hanging forward.
Keep those ends outside the loop. Pulling the whole length through would give you another ponytail, so pause and check the shape before tightening or adjusting the elastic.
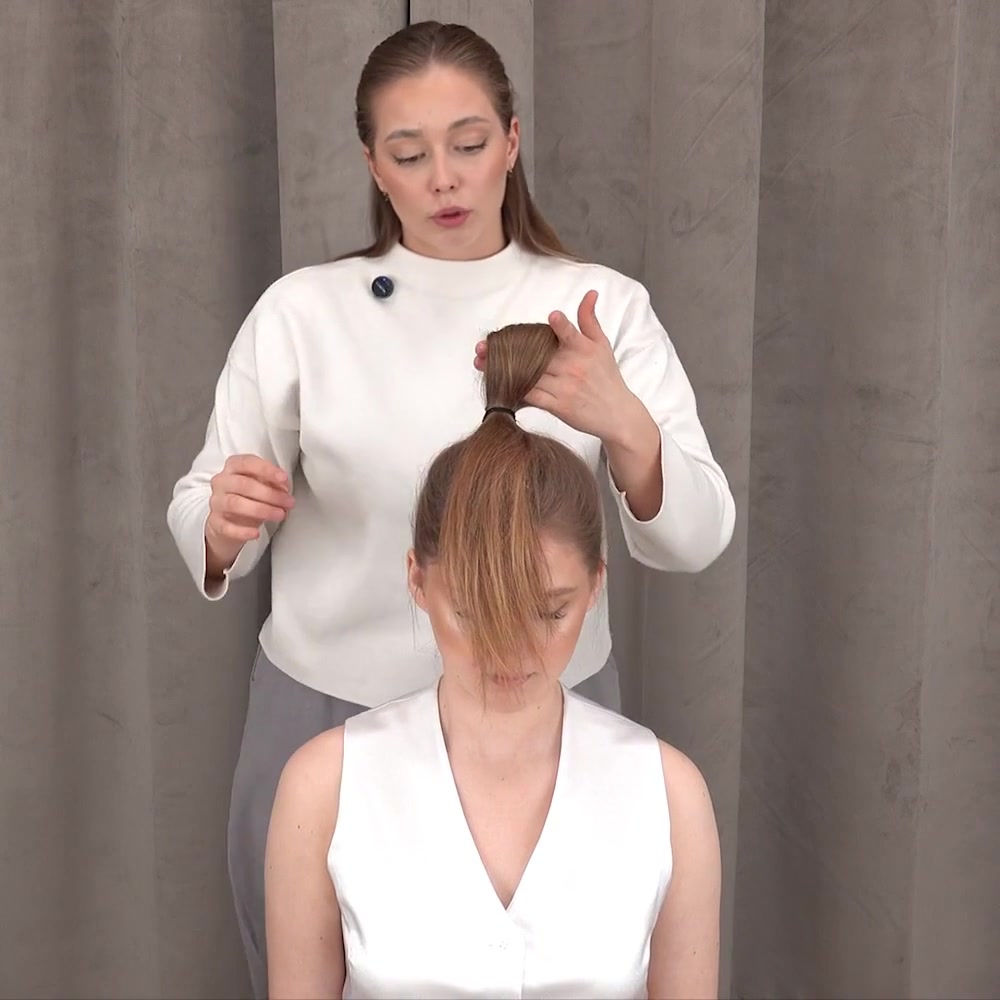
Leave a loop for the bow and a separate tail for the centre wrap.
-
Divide the loop into two equal sides.
Separate the folded loop through the middle with your fingers. Spread one half to each side of the ponytail base, opening the hair into the wings of a bow. Keep the loose ends forward while you work.
Compare the width and height of both sides. Adjust a small amount of hair at a time, rather than pulling one loop sharply outward. The halves should look balanced before you secure them.
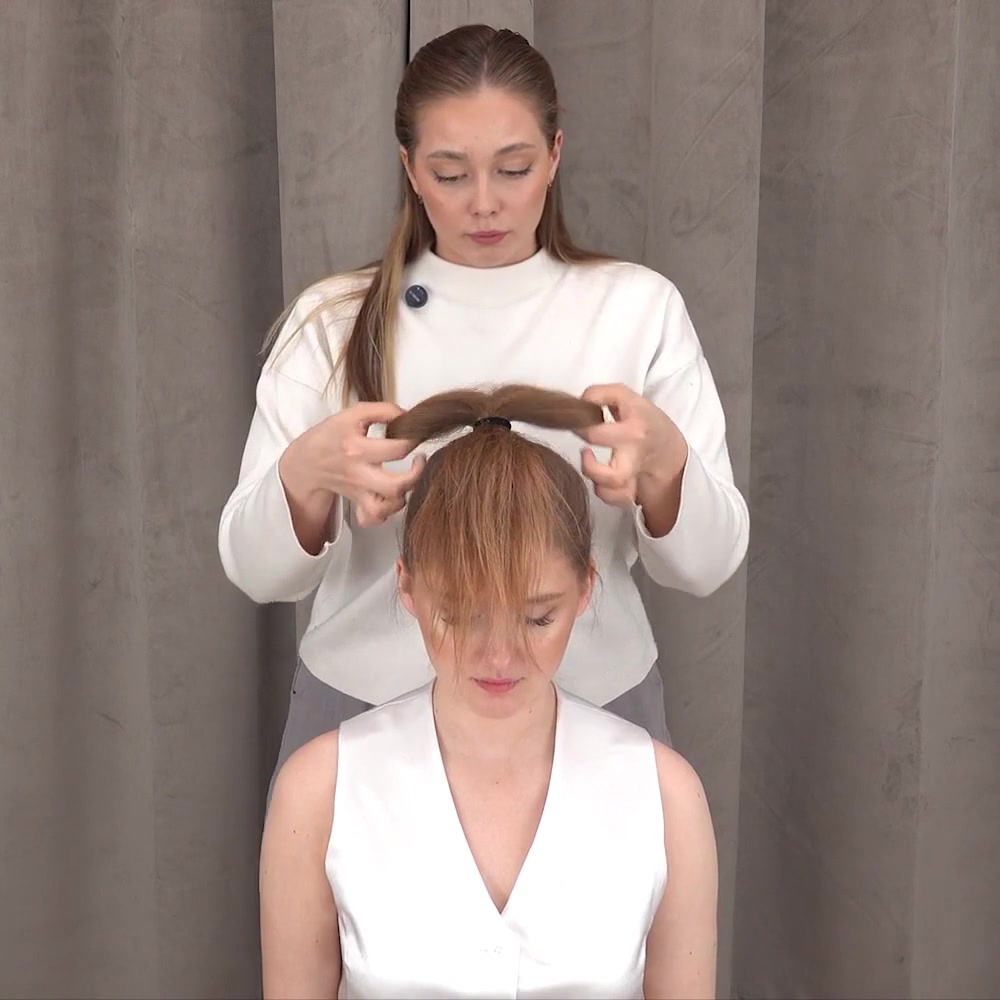
Open the loop sideways and balance the two halves.
-
Pin the lower edge of each loop.
Hold the shape with one hand and secure the bottom of a loop with a bobby pin near the base. Repeat on the other side. Keep the pins tucked beneath the hair so the visible surface stays smooth.
Release your supporting hand gently to check whether the loops stay in place. If a side collapses, support it again and adjust its pin before moving on to the centre.
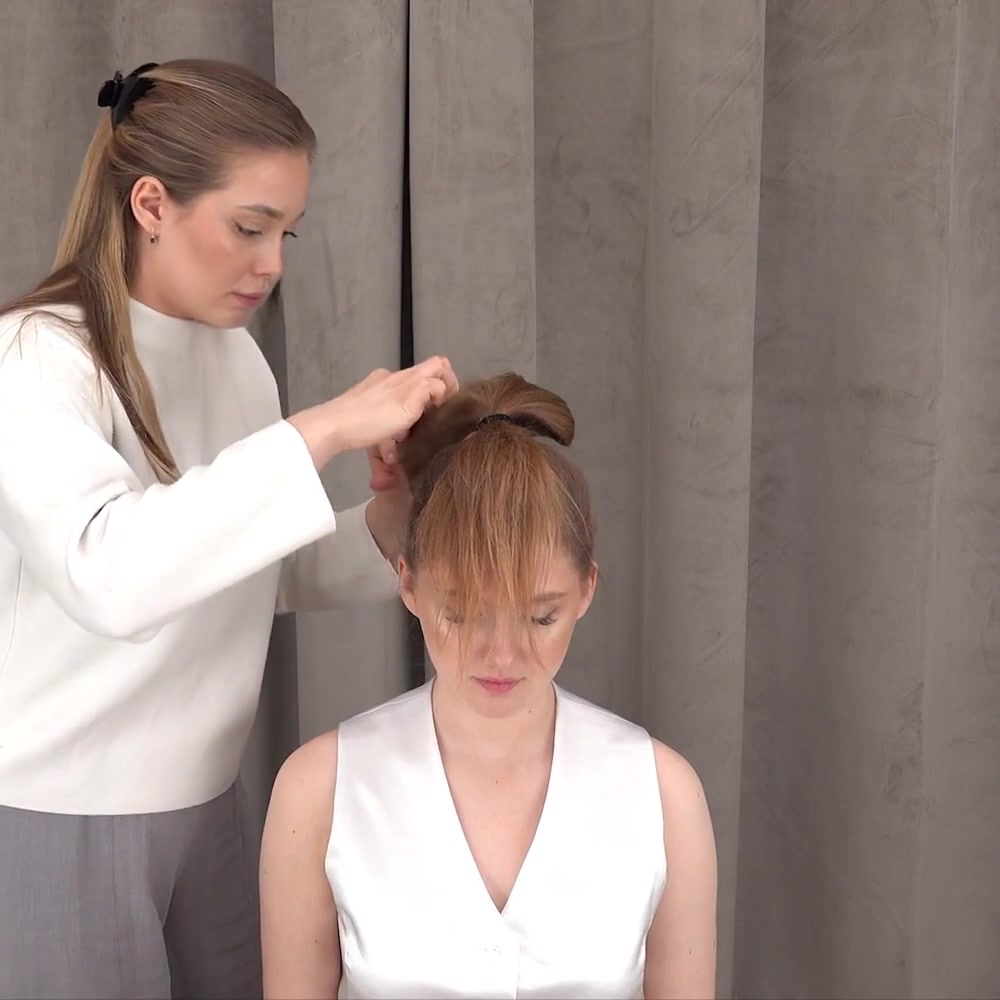
Secure the loops before covering the middle.
-
Bring the loose ends over the centre.
Lift the tail that has been hanging toward the face and bring it back over the gap between the loops. Spread it neatly across the centre so it covers the elastic and creates the appearance of a bow knot.
Hold the wrap in place and secure it behind the bow with a bobby pin. Keep enough tension to make the centre look tidy without dragging the loops inward or flattening them.
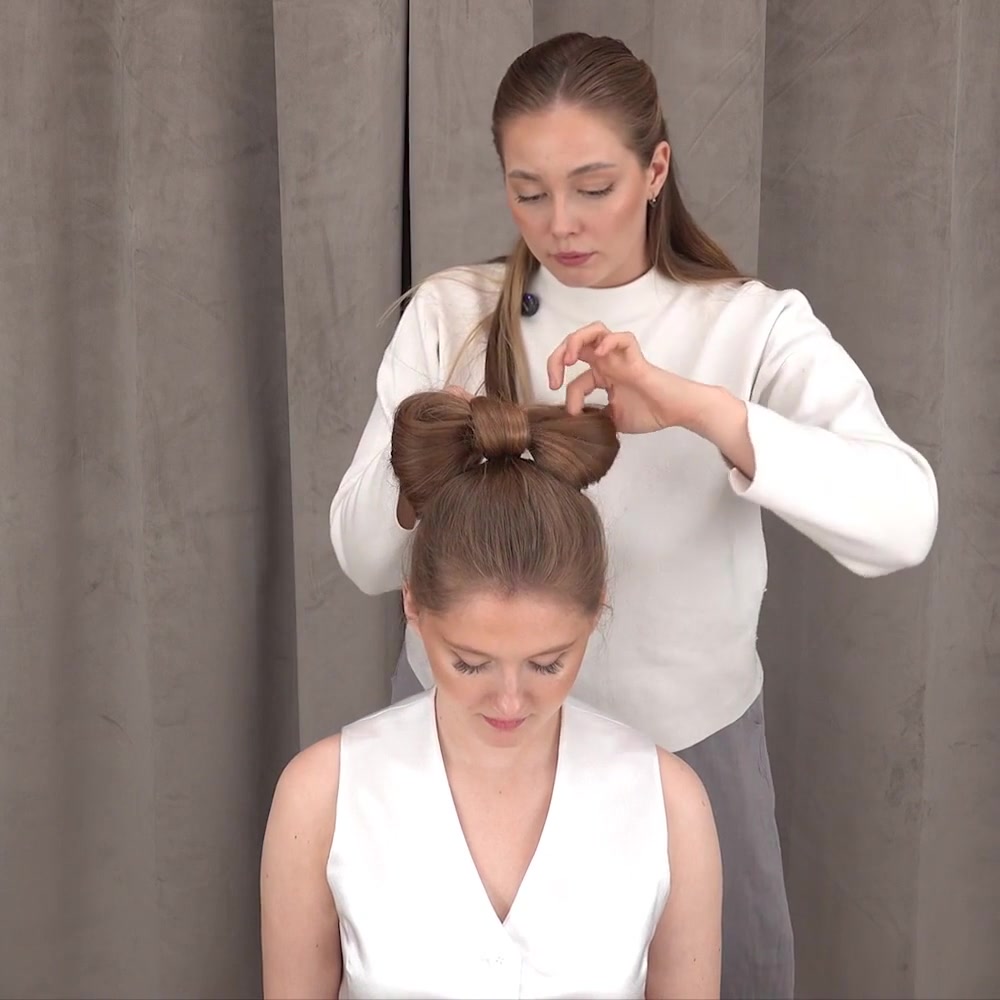
The remaining ponytail becomes the smooth centre wrap.
-
Tuck away the remaining length.
Check the bow from behind. Fold a short tail out of sight beneath the bow and pin it. If a longer section remains, as it does on the model, guide it underneath the style and tuck the ends into the gathered hair at the back.
Do not force all the length into the centre wrap. Spread the hidden section where it can sit neatly, then secure it. Use a mirror to check that neither a loose tail nor an exposed pin interrupts the shape.
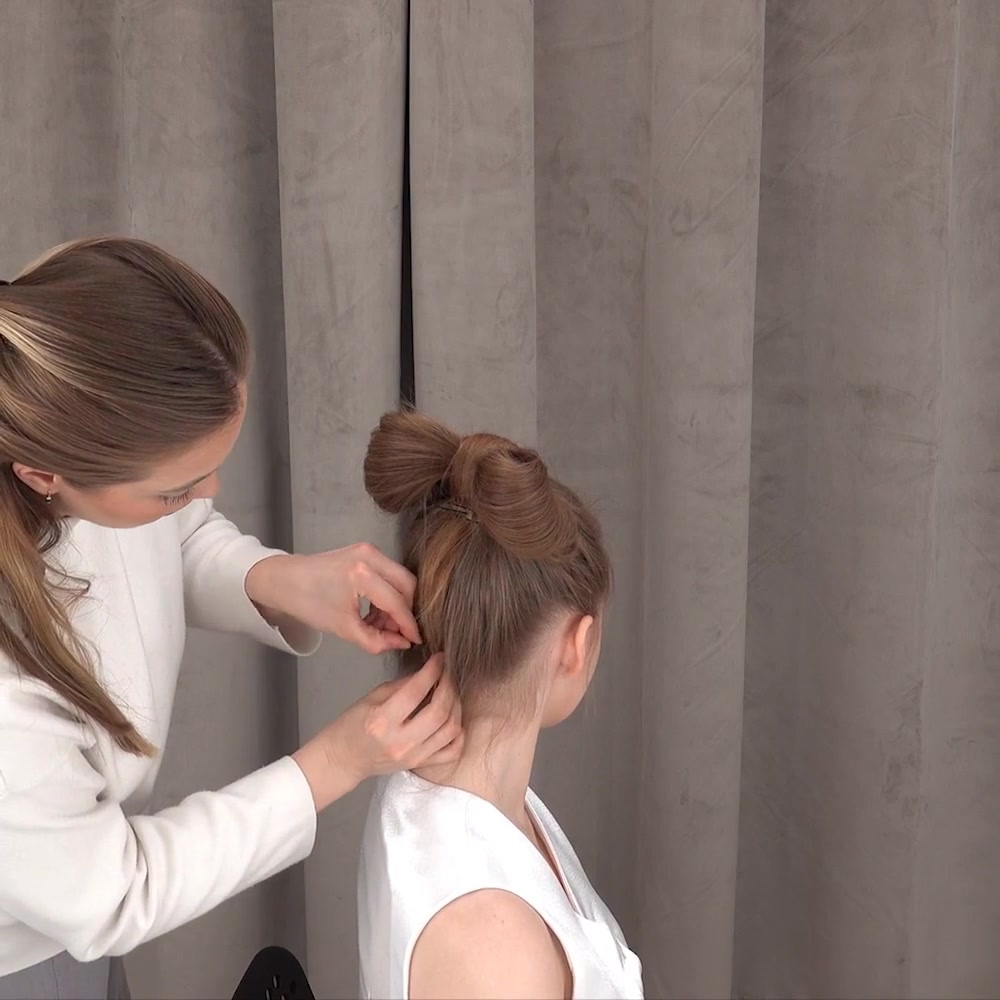
The rear view shows where to hide the extra length.
-
Shape the bow and finish with hairspray.
Refine both loops with your fingers and comb. Support each side as you apply hairspray, then give the product a moment to set before letting go. Smooth the front, sides and back without brushing through the finished loops.
Check that the centre wrap covers the elastic, both sides sit evenly, and the ends remain hidden. If a loop still moves, adjust its pin rather than relying on more spray alone.
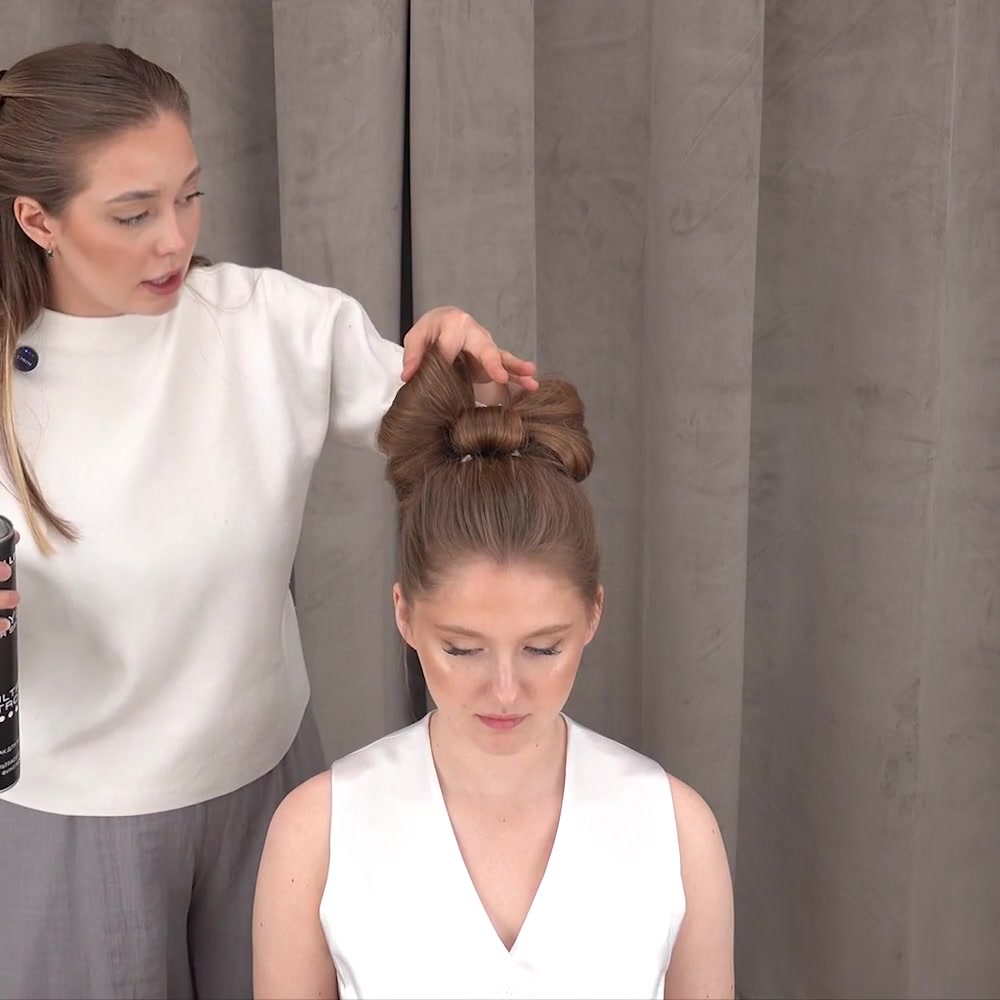
Support the shape while you finish it.
Why does a hair bow look uneven or fall flat?
Check the base, loop size and pin placement separately. If you keep reshaping a loop while the ponytail underneath moves, the bow will be difficult to balance.
| What you see | What to check | What to adjust |
|---|---|---|
| One side looks larger | The original loop may be divided unevenly | Rebalance the halves before tightening the centre wrap |
| A loop drops forward | Its lower edge may not be anchored | Support the loop and reposition the pin near the base |
| The elastic is visible | The centre section may be too narrow or off-centre | Spread the wrapping section across the gap |
| A bulky lump appears behind the bow | Too much leftover length may be gathered in one spot | Tuck the length underneath more evenly |
| Flyaways stand above the surface | Some strands may have escaped during shaping | Smooth that area gently with a comb and a little hairspray |
These are practical checkpoints for following this method, rather than a guarantee that every hair texture will behave like the model's hair.
Frequently asked questions
Can you make a bow out of your own hair?
Yes. The bow in this tutorial is made from the ponytail itself. Its folded loop forms the sides, while the remaining hair wraps over the centre. You need elastics and pins to hold the shape.
How long does your hair need to be?
It must reach the chosen ponytail position and leave enough length to form a loop and cover the centre. The lesson demonstrates the technique on long hair; it does not establish a minimum length. If short layers fall out when you fold the ponytail, this particular full updo may be difficult to reproduce neatly.
Can you do a half-up hair bow instead?
A half-up bow leaves the lower hair loose and uses the upper section to create the bow. It is a separate variation from the full updo shown here. For a photo example, see All Things Hair's half-up bow tutorial.
Can you make this hair bow without bobby pins?
This method uses pins to anchor the loops and hide the ends. Follow that sequence if you want to reproduce the demonstrated result. Pin-free versions use different techniques, such as the single-elastic bow demonstrated by Princess Hairstyles.
How do you hide the hair tie?
Bring the loose tail over the gap between the bow's sides and spread it across the elastic. Secure the wrap behind the bow, then tuck away any leftover length. Check from the front and back before finishing with hairspray.
Do you need a curling iron to make this bow?
No curling step appears in the demonstrated bow technique. The bow is shaped by folding, separating and pinning the hair. Any heat styling you choose to do beforehand is a separate preparation step.
The details that make this bow recognisable are balanced loops, a covered centre and neatly hidden ends. Get those in place before the final spray, and use the rear-view photo whenever you need to check where the remaining hair goes.
Tutorial and photographs: Oh!Nice SPACE, Hair Bow video lesson.